What Is Printmaking?
- sulagnaroy204
- Apr 13, 2021
- 6 min read
Updated: Feb 3, 2022
An artistic process based on the principle of transferring images from a matrix onto another surface is what we call Printmaking. These images are usually transferred on paper or fabric and traditional printmaking techniques include woodcut, etching, ethnography, and lithography amongst other such techniques. One of the biggest benefits of printmaking is that multiple impressions can be made of the same design from one single matrix!
There is always a matrix and this is a very important part of printmaking because this is what helps start the printing. It is a template usually made of wood, metal, or glass and is created on a flat surface with tools or chemicals. The matrix is then inked to transfer the design onto the desired surface. Printmaking requires the application of pressure, mostly using a printing press which creates an even impression of the design on your preferred surface. There are a few modern printmaking techniques, which do not require a press like a screen painting but all traditional techniques do require one! the printing press helps in getting an even design that looks like a mirror image of the original design on the matrix.

Here are the most popular 7 printmaking techniques for you to try and create mesmerizing designs of your own:
1. WOODCUT
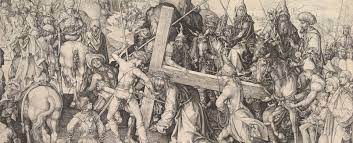
Woodcuts became one “of the great forces which were to transform medieval into modern life,” as George E. Woodberry wrote in his 1883 book History of the Wood Engraving. It was the art of woodcuts that didn’t only revolutionize printmaking rather it even revolutionized people’s access to literature and art.
People started using this technique print from the 15th century to print multiple images of texts and images. But carving everything on wood manually became hard hence this technique was only used in the Bible and the Buddhist Sutras. Before this technique came about, texts were only accessible to the wealthy, but once texts and images hit the printing press, they became more common goods.
2. LINOCUT
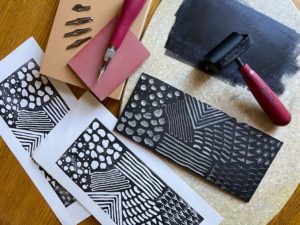
Linocut shares a graphic quality similar to the woodcut because their relief process is due and this enables you to create images with flat planes of color and fluid lines. This technique emerged in the 20th century and came under the category of relief printmaking but instead of carving the wood, linocuts were made by cutting into a sheet of linoleum.
You are free to carve in any direction using woodcut or engraving tools and since linoleum has a smooth surface, it just leaves a light, spongy and grainy texture behind it. Introduced to beginner printmakers since it is easy to learn, and uses low-cost materials making it equally accessible to all. And because linoleum is thinner. You can just apply pressure with your hand!
3. ENGRAVING
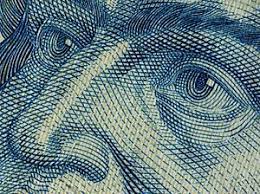
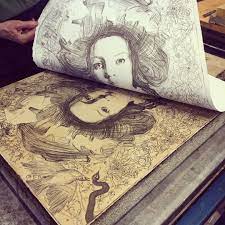
This is the oldest form of intaglio printmaking as well as one of the most difficult ones to execute. This technique involves making incisions, and/or grooves in a plate, covering them in ink, and place the printing press which in turn force the paper into the plate’s grooves to pick up the ink. When the paper and the plate are now pulled apart, you will see an exact copy on the paper. Anything that you carve shows up on being printed. ‘intaglio’ comes from an Italian word INTAGLIARE which literally means ‘to cut in’ and these incisions are completely made by hand is what makes this one of the hardest techniques to master.
This technique might seem simple but using a burin to accurately incise a metal surface is not at all an easy feat!
4. ETCHING
One of the most common intaglio techniques, this process involves covering a metal plate with a thin wax-like layer called the ‘ground’. You then draw your design onto a plate with a needle but you don’t have to press as hard, making scratches is more than enough. Once done, just add a coat of varnish and then immerse the plate into a bath of acid!
Since the ground and varnish both are impermeable to acid, this bath will only affect the metal where you made lines and will make them smooth and create smooth incisions. The level of acidity can easily be played by keeping in mind the amount of time it bathes in acid.
Since the ground and varnish are impermeable to acid, the acidic bath will only affect the metal where lines are drawn. As the plate lays in the bath, the acid will eat away at the marks you made, creating fine incisions. “This technique allows you to achieve a range of shallow and deep grooves; where an incision is shallow, the ink will be fainter, and where the incision is deeper, the ink will be more prominent.”

5. MONOTYPE
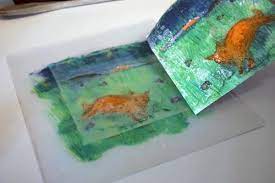
It is one of the planographic techniques under printmaking and each print pulled from a plate or a block is called an ‘impression’. When we think of printmaking, the one thing that comes to mind is multiple prints. But when it comes to a monotype, there is just one single impression being created. They are typically created with just a piece of glass but can also easily be made with another piece of smooth, non – absorbent material.
This is another technique used a lot by beginners because of one thing; it does not require a printing press. There although are a ton of methods to create a print, here what is used is a roller and ink. You use a roller and apply ink through it on the design. Just put a piece of paper on it, press it, and pull to see your design transferred onto the paper. This design will be reverse on thought!
6. LITHOGRAPHY
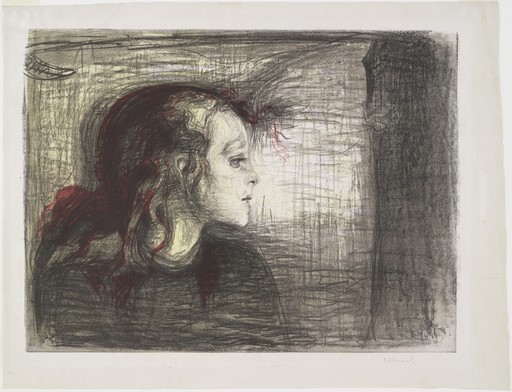
Similar to monotype, it is also a subset of planographic printmaking. Lithographs were first used in 1798 in Munich using a large slab of limestone or metal plate which requires an intensive process of developing an image on the stone or plate. To start this process, the surface of the stone is prepped with grit and sand-like dust along with a levigator (a heavy circle attached to the handle). You start spinning the wheel one millimeter at a time, it helps in leveling the surface of the stone which in turn will provide you with even prints.
Next, the stone is sensitized by dampening it and applying an acidic liquid and when this is washed off, the stone becomes dry and a substance called ‘Gum Arabic' is put around the edges to create a border to the image. Now you can easily start the process of transferring the image. This process uses talcum powder, resin. The liquid etched solution, gum Arabic, and mineral spirits, and each of these play a significant role in transferring the image.
7. SCREEN PRINTING
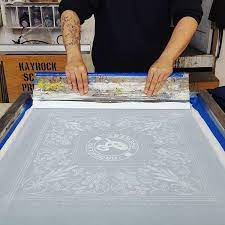
This one is a unique medium because the print isn’t made directly from the surface of the block or a plate, rather these images are printed through a screen mesh using stenciling techniques.
Beginners learn to use this technique by starting with a hand-cut stencil with the help of a knife to cut the design from the sheet of an adhesive-based plastic film. Then you place the mesh screen on a piece of paper and using a squeegee you pull the ink across the top of the screen and every time you cut out a shape from the film, the ink will slide onto the page.
Another way to do so is to cover the screen with a hardener leaving the design. This will fill in all the screen’s holes and you can then use a computer to print the negatives of your designs on transparent plastic. Next, you add your design and lay the emulsion-covered screen on top.
When you now put the exposure on, the bright light will only pass where there is a negative space of your design. Once the screen is exposed, you use a high-power washer to blow the emulsion that the light exposure. This allows artists to achieve a finely detailed screen and has been for advertising as well as clothing!
Believed to have originated as early as the 1st century AD during the Han dynasty in China, the medium’s ability to reproduce images and create unique visual qualities has influenced everyone from book publishers to graphic designers! This medium has experimented with a lot but every time that is done, a new technique pops out and this is what makes printmaking just so exciting!
TELL US YOUR VIEWS ABOUT PRINTMAKING IN THE COMMENT SECTION BELOW!
Wishing you a 'creative escape' ahead!







Comments